


In our earlier blog under the xUnit testing tutorial series, we had a look at setting up the xUnit.net framework (further referred as xUnit) in Visual Studio 2019 (VS 2019). Today our core focus is on Selenium test automation with C#. So, we would also need to install the Selenium WebDriver.
Irrespective of the test framework being used, Selenium tests can be executed on a local Selenium Grid as well as remote or cloud-based Selenium Grid. The test case which is presented in this xUnit testing tutorial is executed on the local Selenium grid, i.e., target web browser, corresponding Selenium WebDriver for the browser, Selenium test framework, etc. are present on the machine from where tests are triggered.
Getting Started
Every web browser has its corresponding WebDriver that has to be installed before that browser is invoked from using the Selenium APIs. For xUnit testing framework setup, the example used for target web-page will be opened on the Chrome browser. Hence, Chrome WebDriver has to be installed on the machine where xUnit.net and Selenium test automation framework is already installed.
The locations from where you can download Selenium drivers for popular browsers like Chrome, Firefox, Internet Explorer, Microsoft Edge, Safari, etc are listed down here-
In this xUnit testing tutorial, we will use the Chrome browser for test execution. We download the Selenium WebDriver for Chrome from the location mentioned above and install it in the directory where the Chrome browser (i.e., chrome.exe) is installed.
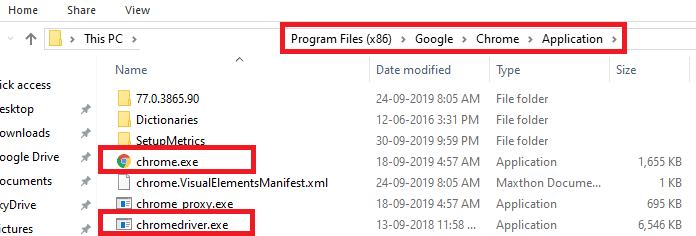
If the above-mentioned installation practice is followed, we won’t need to specify the location of Chrome WebDriver when the browser is invoked from the core.
C#, xUnit, & Selenium WebDriver Demonstration
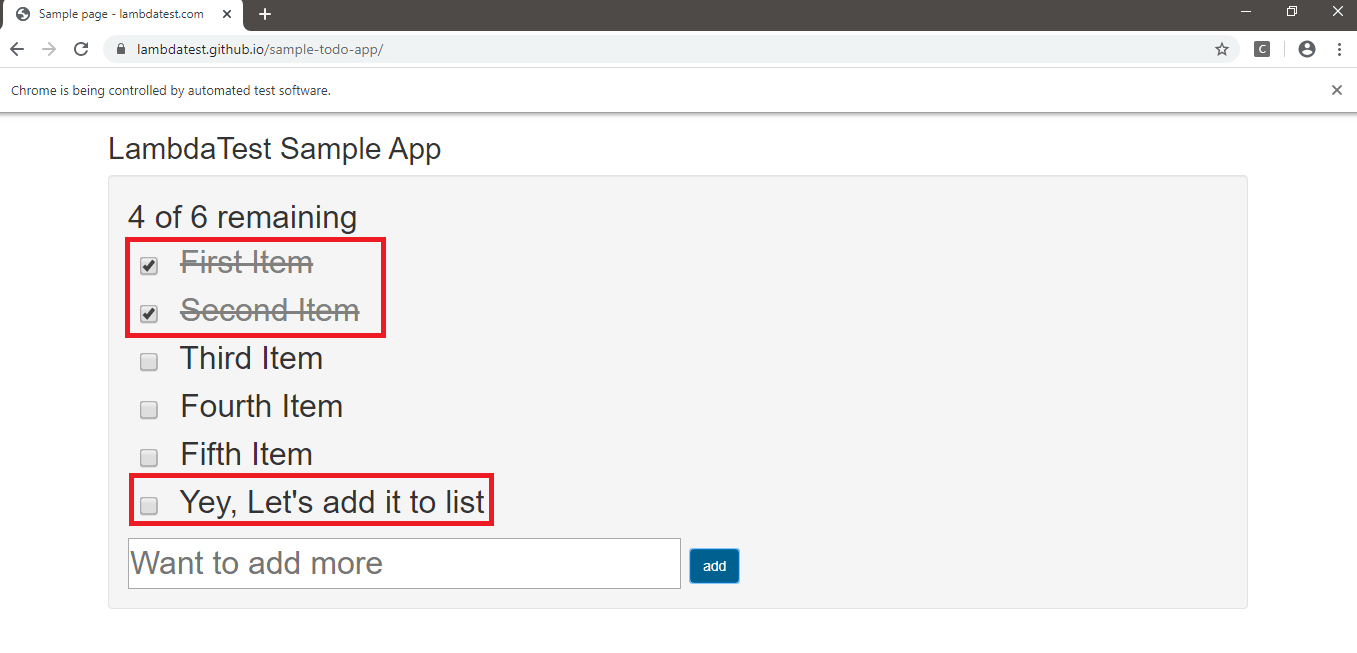
To demonstrate the usage of Selenium WebDriver with C# and xUnit testing framework, we look at the following test scenario-
- Go to this URL- https://lambdatest.github.io/sample-todo-app/.
- Choose the first two checkboxes.
- Now send ‘Adding item to the list’ in the textbox below with this id = sampletodotext.
- Lastly, click on the Add Button and verify whether the text has been added or not.
Implementation
using Xunit;
using System;
using OpenQA.Selenium;
using OpenQA.Selenium.Chrome;

namespace xUnit_Test_Cross_Browser
{
    public class UnitTest
    {
        String test_url = "https://lambdatest.github.io/sample-todo-app/";
        String itemName = "Yey, Let's add it to list";

        [Fact]
        public void NavigateToDoApp()
        {
            IWebDriver driver;

            driver = new ChromeDriver();
            driver.Navigate().GoToUrl(test_url);
            driver.Manage().Window.Maximize();

            Assert.Equal("Sample page - lambdatest.com", driver.Title);
            // Click on First Check box
            IWebElement firstCheckBox = driver.FindElement(By.Name("li1"));
            firstCheckBox.Click();

            // Click on Second Check box
            IWebElement secondCheckBox = driver.FindElement(By.Name("li2"));
            secondCheckBox.Click();

            // Enter Item name
            IWebElement textfield = driver.FindElement(By.Id("sampletodotext"));
            textfield.SendKeys(itemName);

            // Click on Add button
            IWebElement addButton = driver.FindElement(By.Id("addbutton"));
            addButton.Click();

            // Verified Added Item name
            IWebElement itemtext = driver.FindElement(By.XPath("/html/body/div/div/div/ul/li[6]/span"));
            String getText = itemtext.Text;
            Assert.True(itemName.Contains(getText));

            /* Perform wait to check the output */
            //System.Threading.Thread.Sleep(4000);

            Console.WriteLine("LT_ToDo_Test Passed");

            driver.Quit();
        }
    }
}
Code WalkThrough
Step 1 – Like any other test framework, we first include the necessary packages before starting the actual test implementation. The packages that are included are xUnit, Selenium, and Chrome WebDriver.
using Xunit;
using System;
using OpenQA.Selenium;
using OpenQA.Selenium.Chrome;
……………………………………………………………………………..
……………………………………………………………………………..
Step 2 – Since this is a non-parameterized test, i.e., the test API does not take any input parameters, we use the [Fact] attribute to declare the test method that is run by the test runner. In this example, the test method we have used is NavigateToDoApp().
[Fact]
public void NavigateToDoApp()
{
    IWebDriver driver;

    driver = new ChromeDriver();
    ……………………………………
    ……………………………………
Step 3 – The IWebDriver acts as the interface through which the user controls the web browser. A new instance of the Chrome browser is created using the command driver = new ChromeDriver().
The test URL is https://lambdatest.github.io/sample-todo-app/ which is set using driver.Navigate().GoToUrl(test_url). The browser window is maximized by invoking the Selenium API Manage().Window.Maximize().
public void NavigateToDoApp()
{
    IWebDriver driver;

    // Local Selenium WebDriver
    driver = new ChromeDriver();
    driver.Manage().Window.Maximize();
    driver.Navigate().GoToUrl(test_url);

    driver.Manage().Window.Maximize();
Step 4 – The elements on which automation testing has to be performed are located using web locators such as Name, ID, XPath, etc. The Inspect tool in the Chrome browser is used to get the details of the web elements. As seen in the screenshot below, the element “li1” is located using the Name web locator. We also follow the same approach for locating the other web elements with Name – li2, li3. The other elements are located using the Id of those elements.

Once the details of these web elements are obtained, appropriate Selenium commands are used to perform actions on the web element.
[Fact]
public void NavigateToDoApp()
{
    IWebDriver driver;

    ...............................................................
    ...............................................................
    ...............................................................

    // Click on First Check box
    IWebElement firstCheckBox = driver.FindElement(By.Name("li1"));
    firstCheckBox.Click();

    // Click on Second Check box
    IWebElement secondCheckBox = driver.FindElement(By.Name("li2"));
    secondCheckBox.Click();

    // Enter Item name
    IWebElement textfield = driver.FindElement(By.Id("sampletodotext"));
    textfield.SendKeys(itemName);
    ...............................................................
    ...............................................................
    ...............................................................
}
The FindElement command is used to identify the web elements present on the web-page. Once all the web elements are located, appropriate actions are performed on the web element, i.e., Click to select a particular check-box, SendKeys to input some text or in a text-box, and so on.
// Click on Second Check box
IWebElement secondCheckBox = driver.FindElement(By.Name("li2"));
secondCheckBox.Click();

// Enter Item name
IWebElement textfield = driver.FindElement(By.Id("sampletodotext"));
textfield.SendKeys(itemName);
Step 5 – A new item (Yey, Let’s add it to list) is also added to the list. Assert is raised if the content of the newly added item does not match with the text which is supplied in the test code.
[Fact]
public void NavigateToDoApp()
{
    ..........................................................................    ..........................................................................    ..........................................................................    // Verified Added Item name
    IWebElement itemtext = driver.FindElement(By.XPath("/html/body/div/div/div/ul/li[6]/span"));
    String getText = itemtext.Text;
    Assert.IsTrue(itemName.Contains(getText));
As the test execution is complete, the Quit command (driver.quit) is invoked for terminating the WebDriver session and releasing the resources that were used by Chrome WebDriver.
[Fact]
public void NavigateToDoApp()
{
    ..........................................................................    ..........................................................................    ..........................................................................

    Console.WriteLine("LT_ToDo_Test Passed");

    driver.Quit();
}
Execution
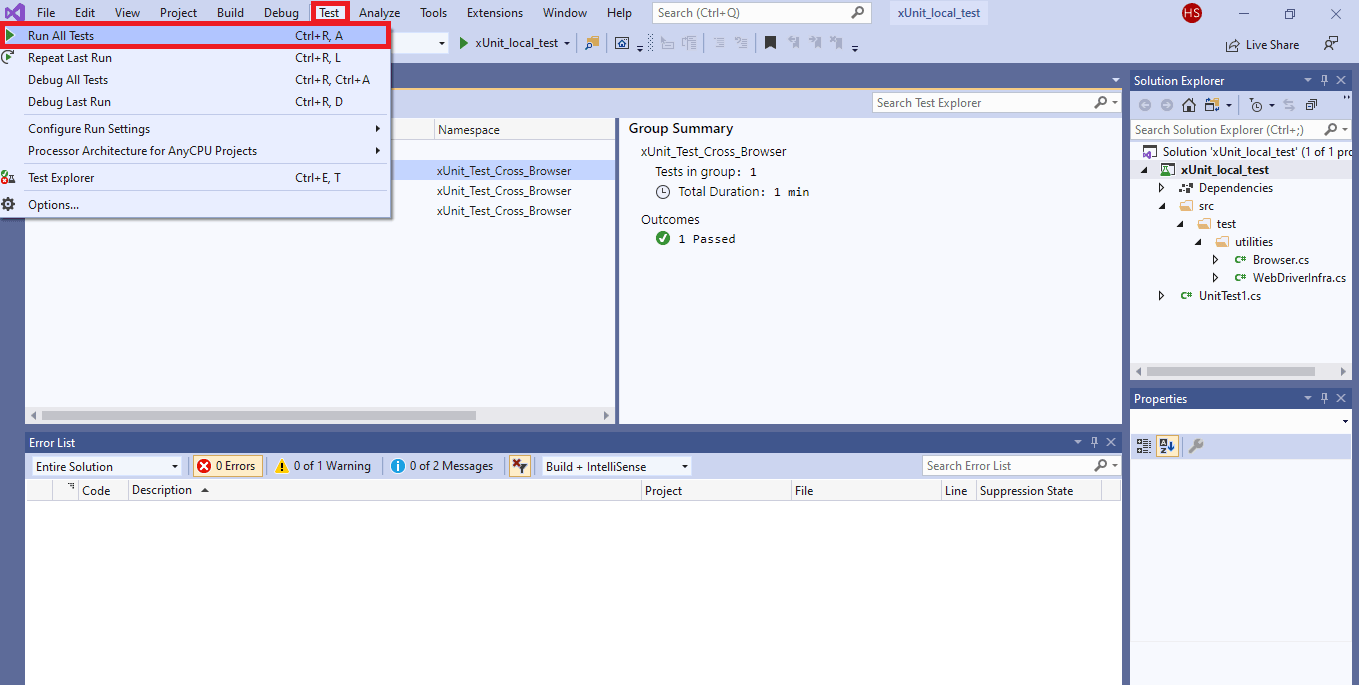
For executing the NavigateToDoApp test case, go to the Test and press Run All Tests.
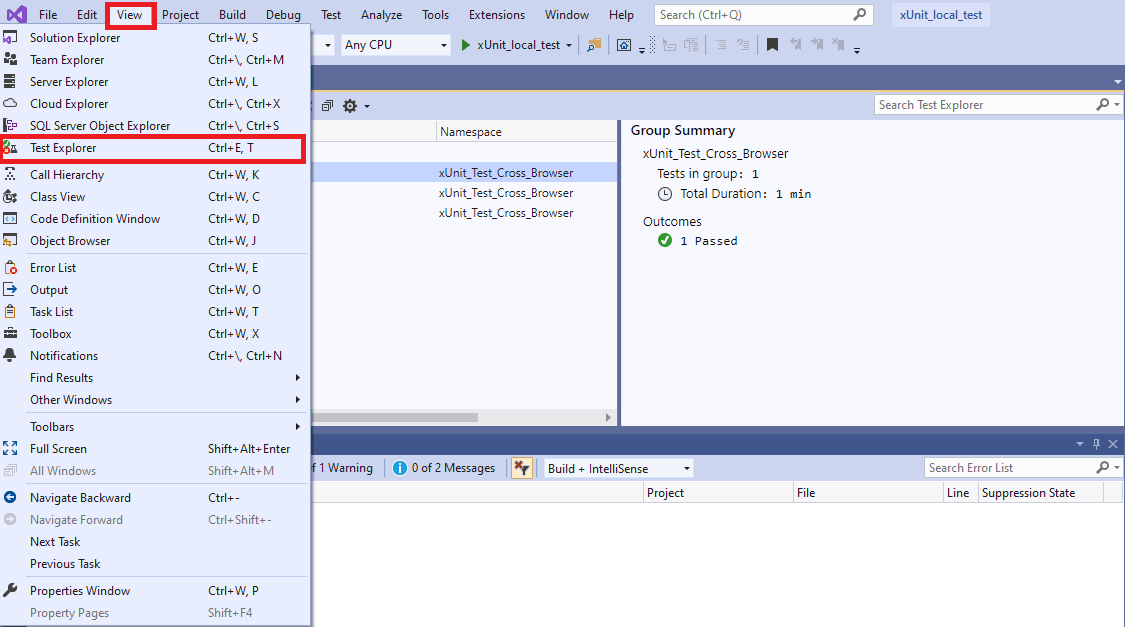
The progress of test execution is available in the Test Explorer window. To open the Test Explorer window, go to View -> Test Explorer.
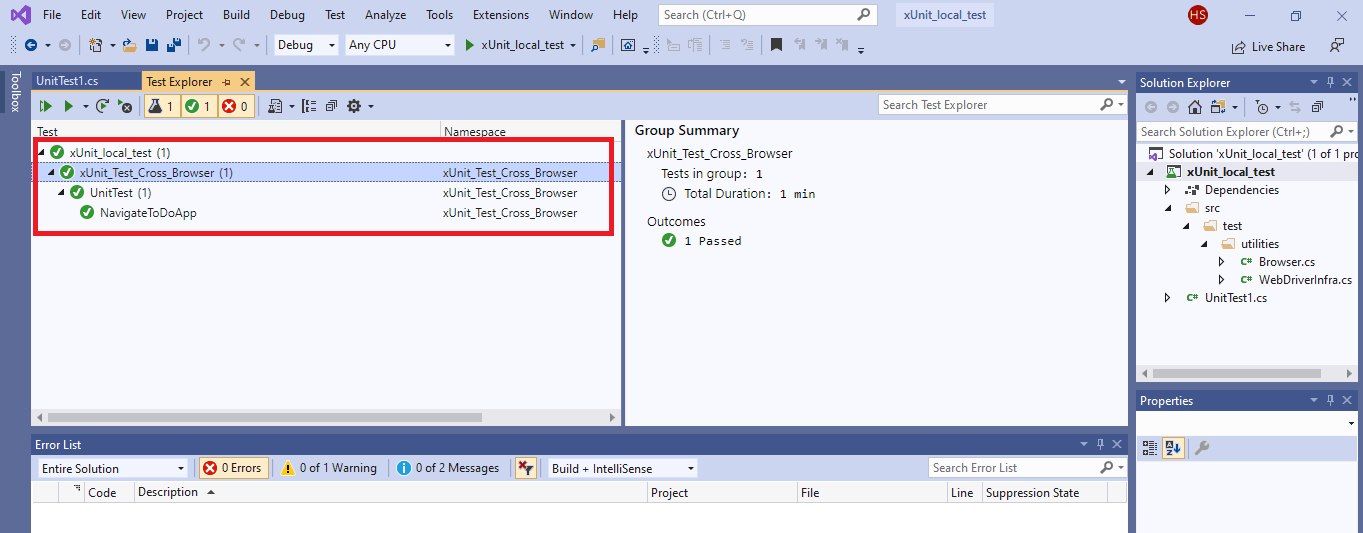
The Green tick mark against the test case i.e. NavigateToDoApp indicates the execution status. As seen in the execution snapshot, the tests were executed successfully.
Shown below is the test case being executed on the Chrome browser:
Conclusion

In this xUnit testing tutorial, we had a look at Selenium test automation using C# & xUnit testing framework. Thorough understanding of the implementation of the ToDoApp test demonstrated as a part of this xUnit testing tutorial is extremely important. It forms the base for more complex tests that can be implemented using C#, Selenium, and xUnit.net (or xUnit) testing framework. We will soon be back with more interesting blogs in this xUnit testing tutorial series. Stay tuned.
Till then Happy testing!